Customization
Customize External ID Format
You can customize the prefix of the external ID for your orders, that will be shown in your Xendit dashboard. Quick steps to do so:
- Go to Setting > Payment > Click Manage on Xendit > External ID Format in your WooCommerce Admin Dashboard
- Modify the prefix in the provided field according to your needs

Customize Payment Channel Selection
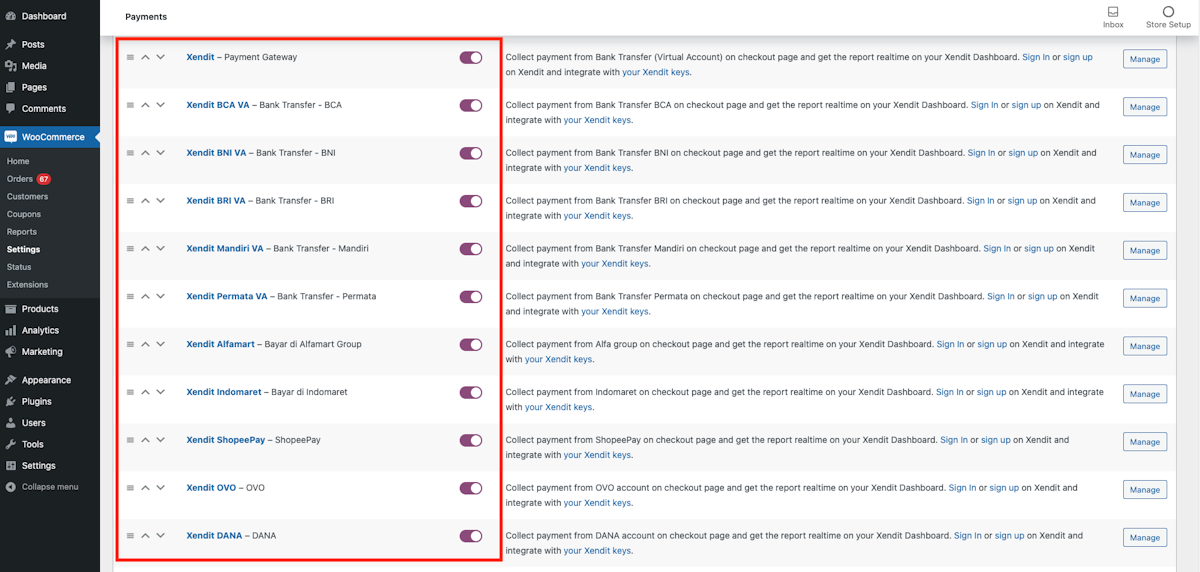
You can customize which payment channel you want to display to your customers upon checkout. Quick steps o do so:
- Go to Setting > Payment in your WooCommerce Admin Dashboard
- Control the payment channel selection from the toggle of each payment channel. Turn the toggle ON (purple) to display the payment channel, and turn the toggle off (grey) to remove the payment channel

Customize Order Status for Successful Payment
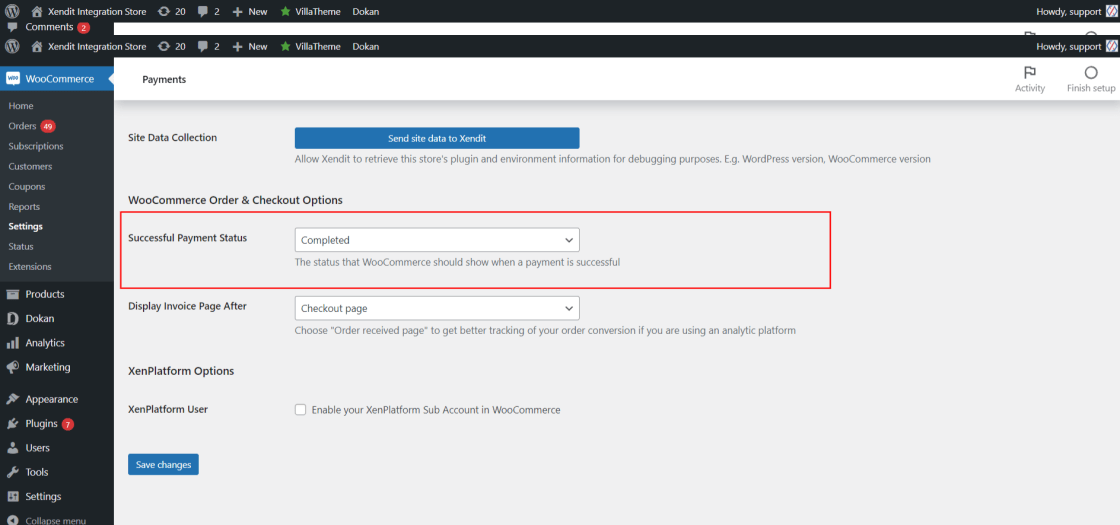
You can customize how you want to treat orders with successful payment according to your desired status. Quick steps to do so:
- Go to Setting > Payment > Click Manage on Xendit > Successful Payment Status in your WooCommerce Admin Dashboard
- Choose one of the following:
- Pending Payment
- Processing
- Completed
- On Hold
- Click Save Changes

Customize Redirection to XenInvoice Page
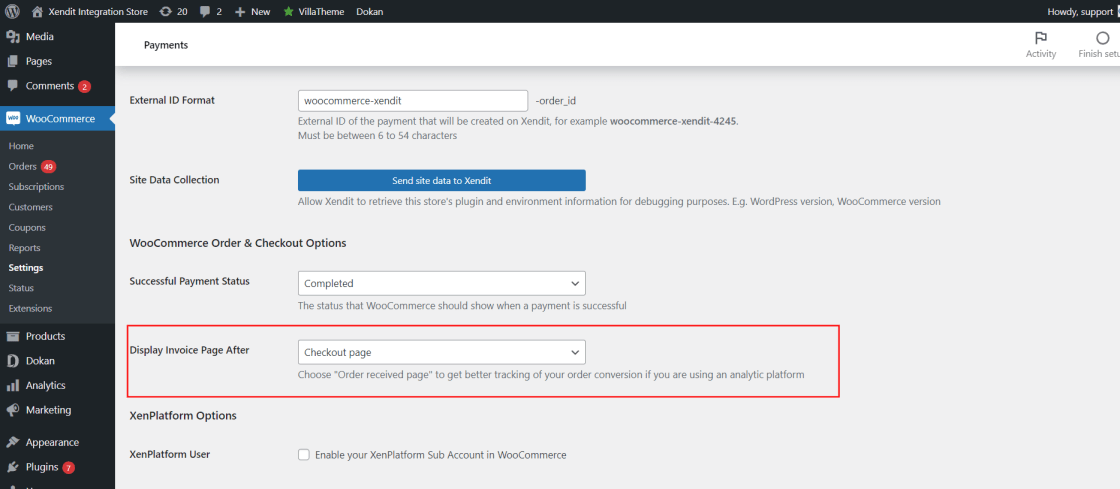
You can customize when your customers will be redirected to the payment page in WooCommerce Setting. You can choose either your customer will be redirected right after checkout or after your customer is landed on the Order Received page.
Quick steps to do so:
- Go to Setting > Payment > Click Manage on Xendit > Display Invoice Page After in your WooCommerce Admin Dashboard
- Choose your setting accordingly and click Save Changes

Last Updated on 2024-05-31