Installation
How to Install
1. Go to your WordPress dashboard and go to “Plugins” tab and click on “Add New”.
2. Type “WooCommerce - Xendit” on the search bar.
3. Install the plugin.
4. Go to “Installed Plugins”.
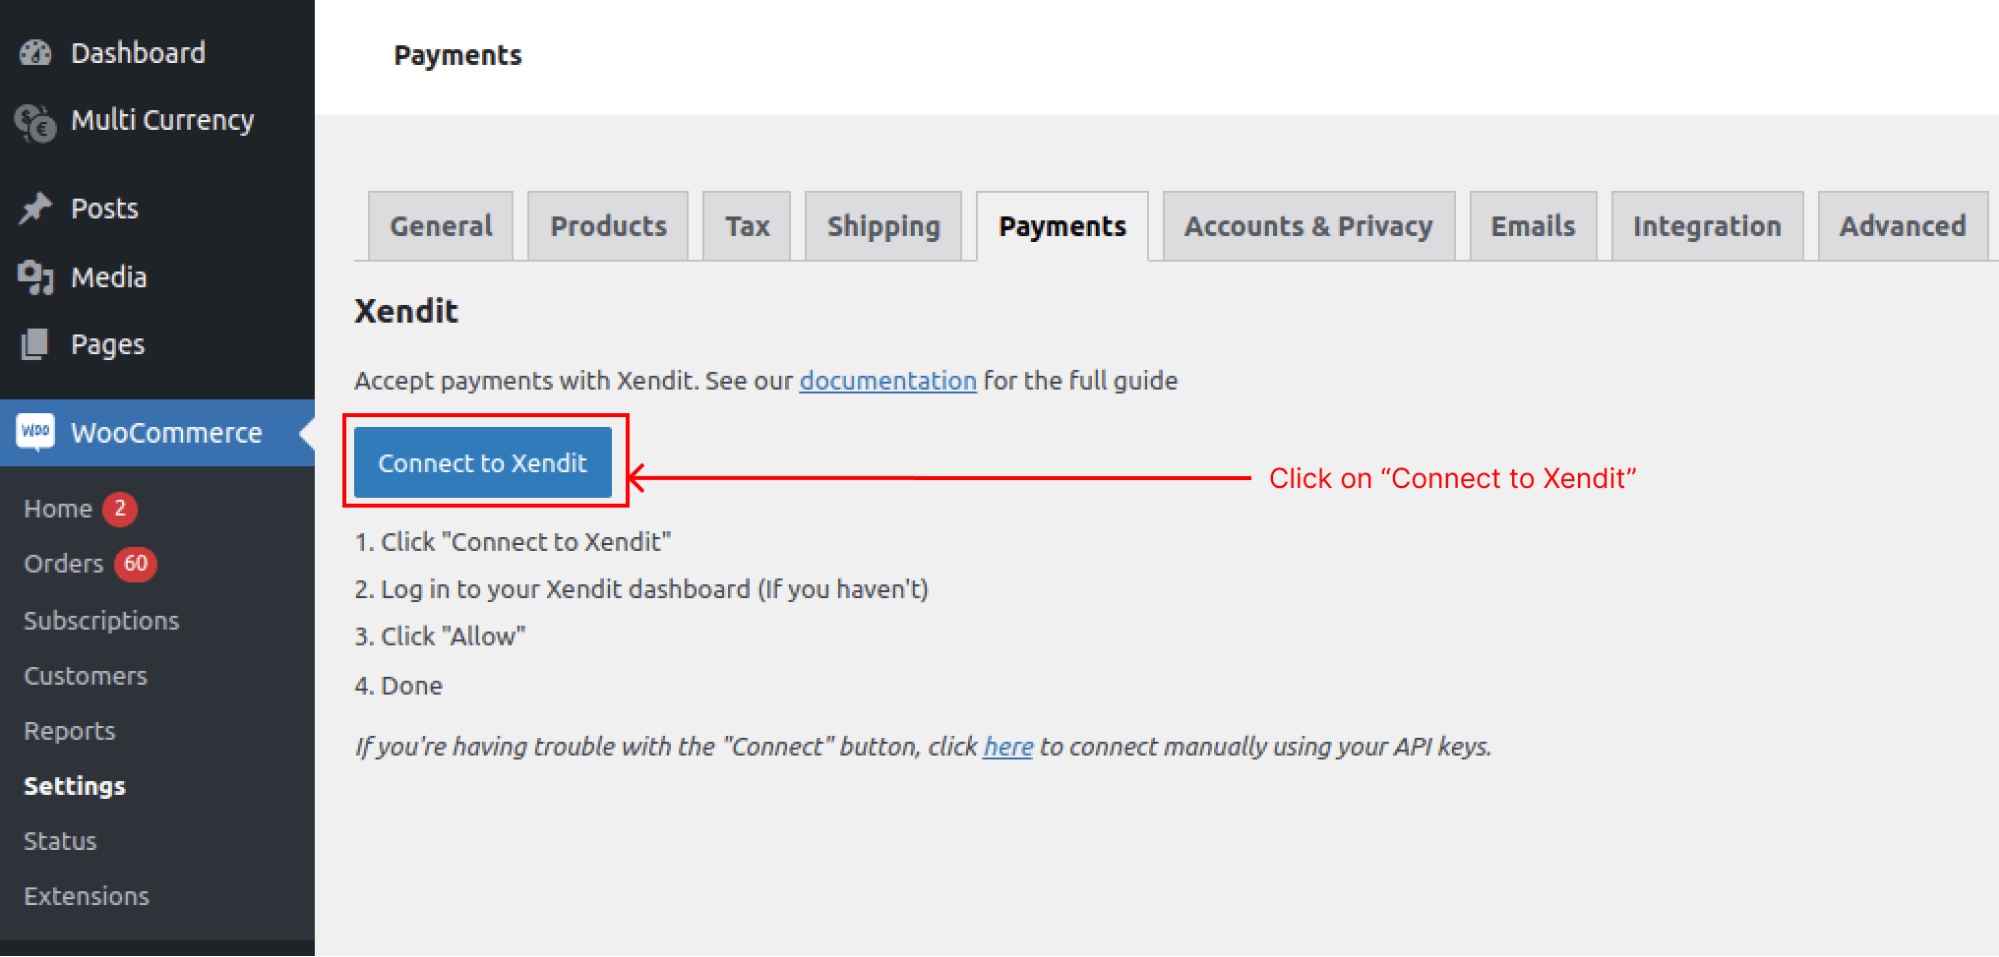
5. Activate WooCommerce - Xendit plugin and click on Settings

6. Click on the “Connect to Xendit” button
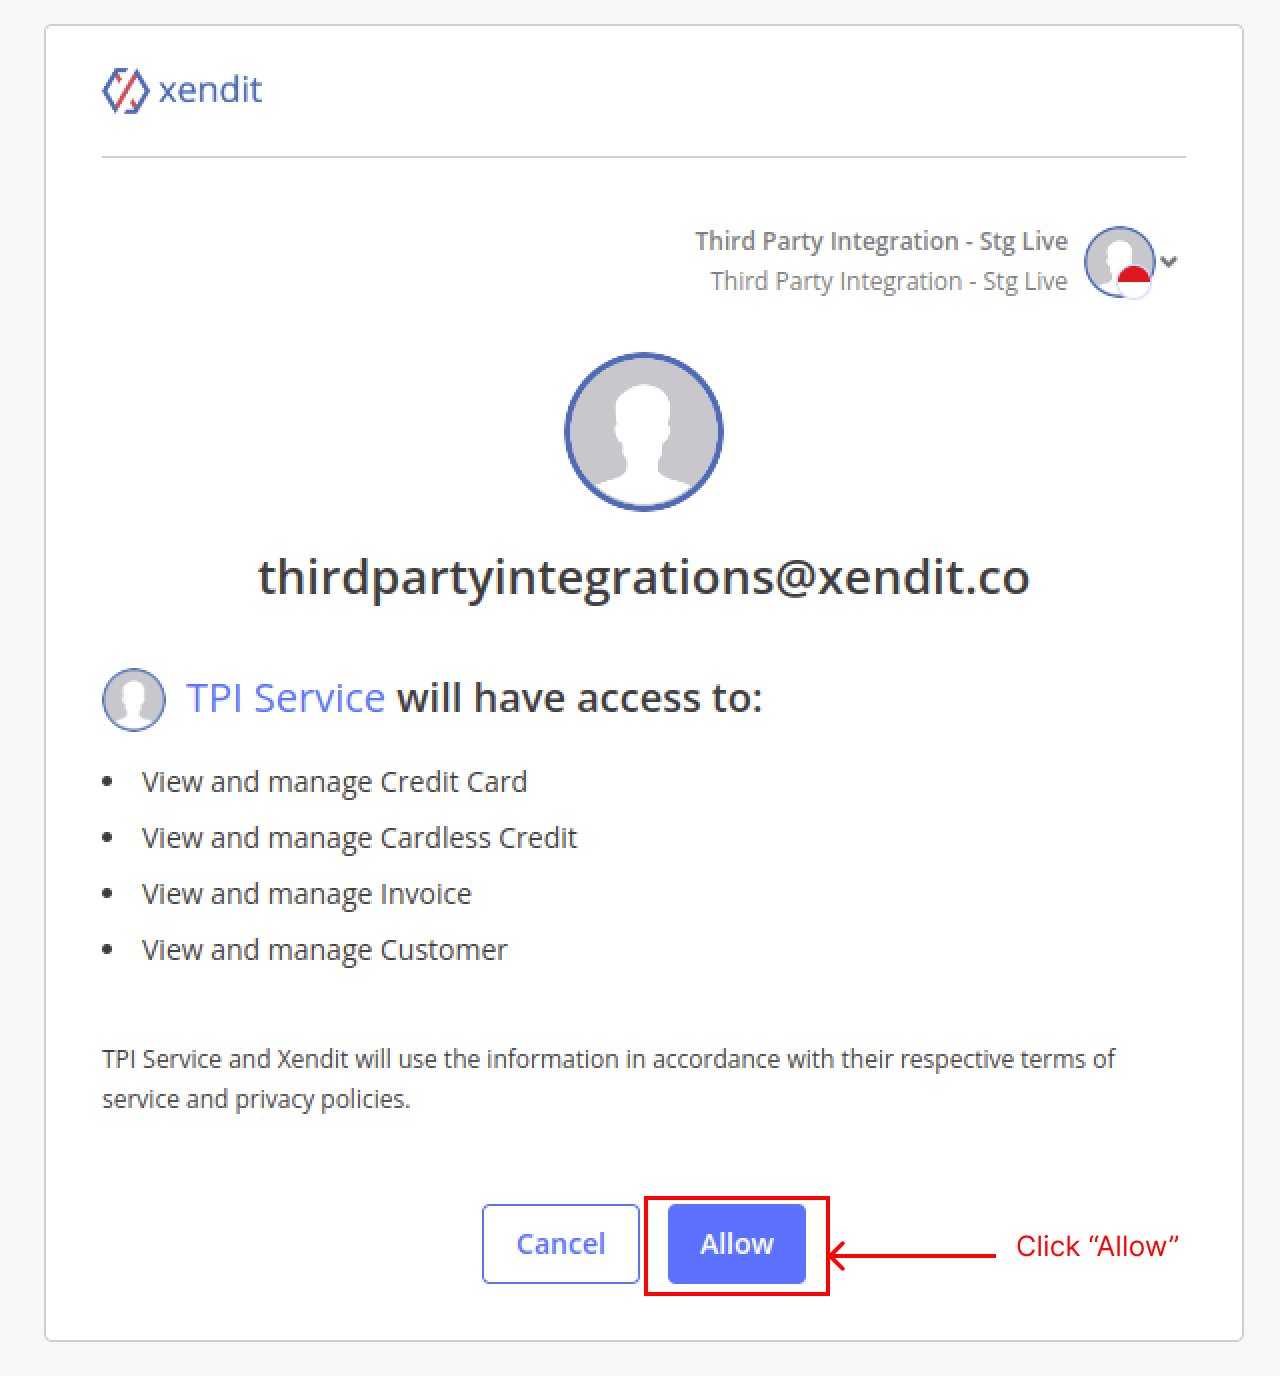
7. Make sure you’re logged in to the right Xendit account, then click on the “Allow” button
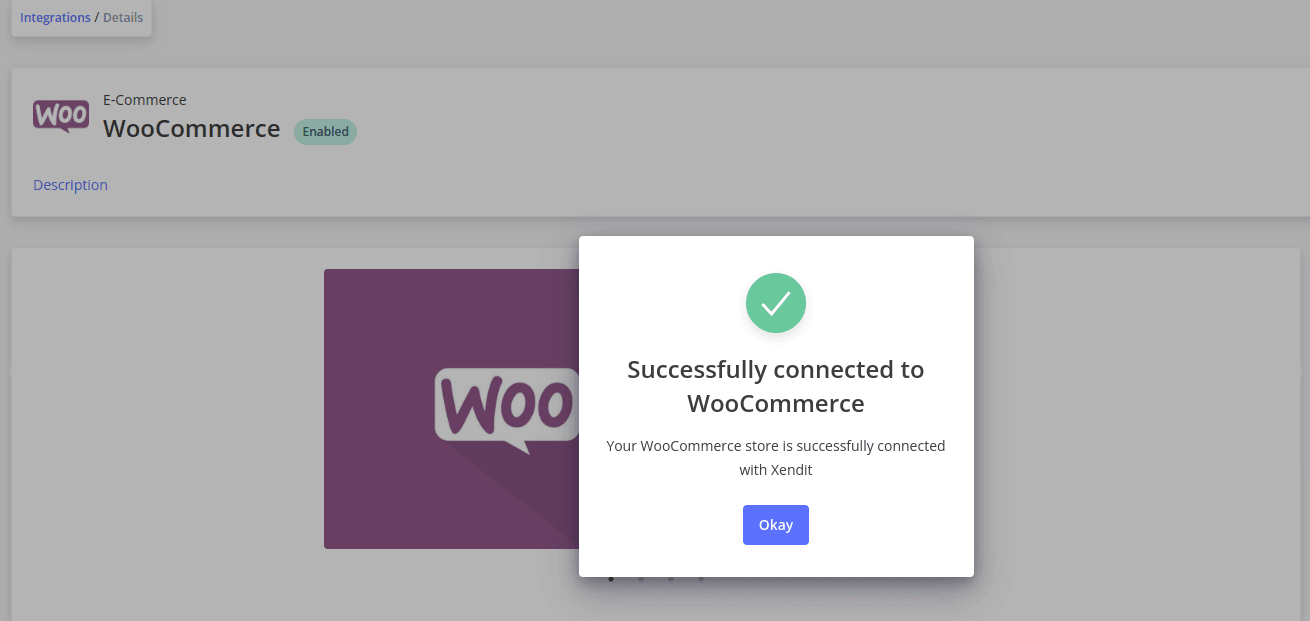
8. You will be redirected to a success page in Xendit Dashboard
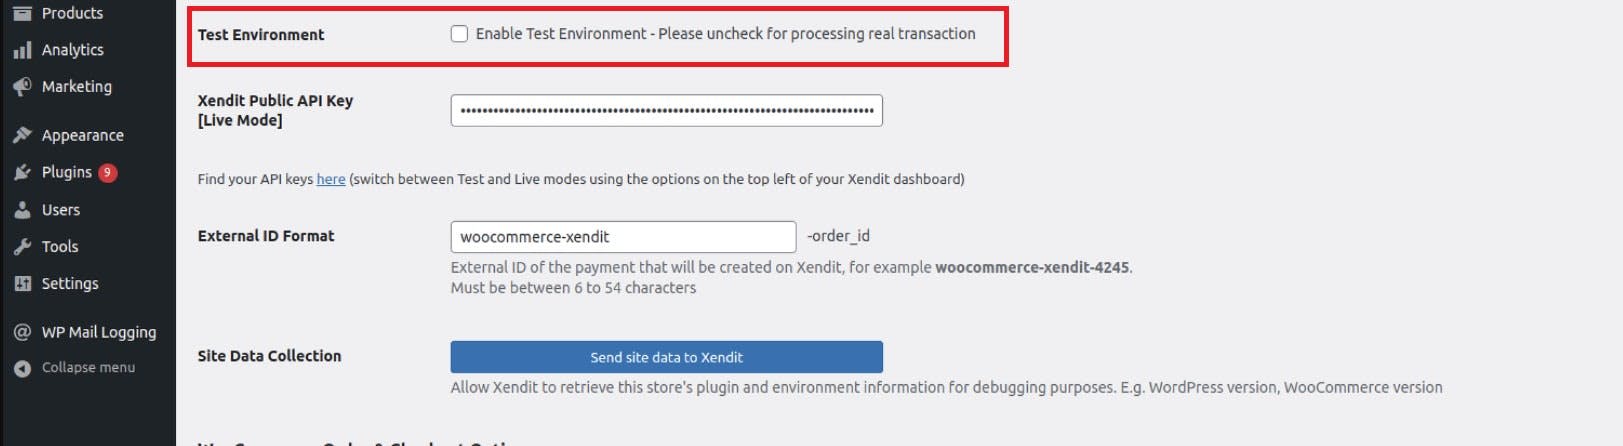
9. You may reload the Settings page on your WordPress dashboard. If you want to use Test Mode first, you can tick the “Enable Test Mode” checkbox. If you want to use Live Mode, please do otherwise. Don’t forget to click “Save Changes” in the bottom of the page
10. Done
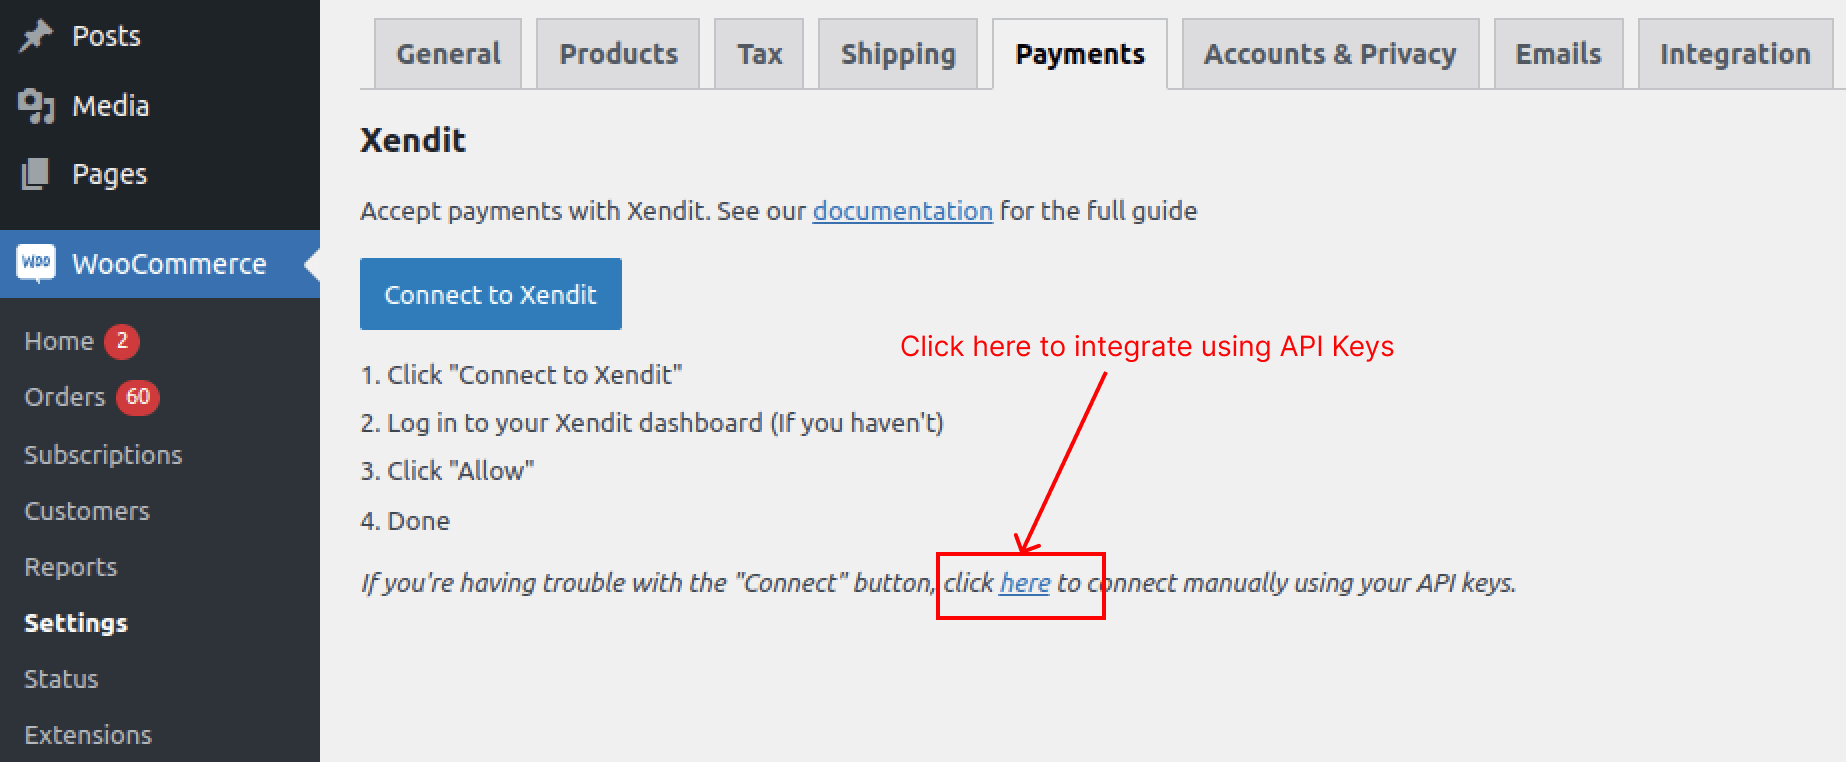
If you have trouble with the installation using “Connect to Xendit” button, please follow this workaround:
1. Instead of clicking “Connect to Xendit” button, hover to the remarks below and click the link attached to integrate using API keys
2. You will be redirected to this page, where you can enter your API keys. Click the attached link in the image below to find your Public and Secret API keys from Xendit
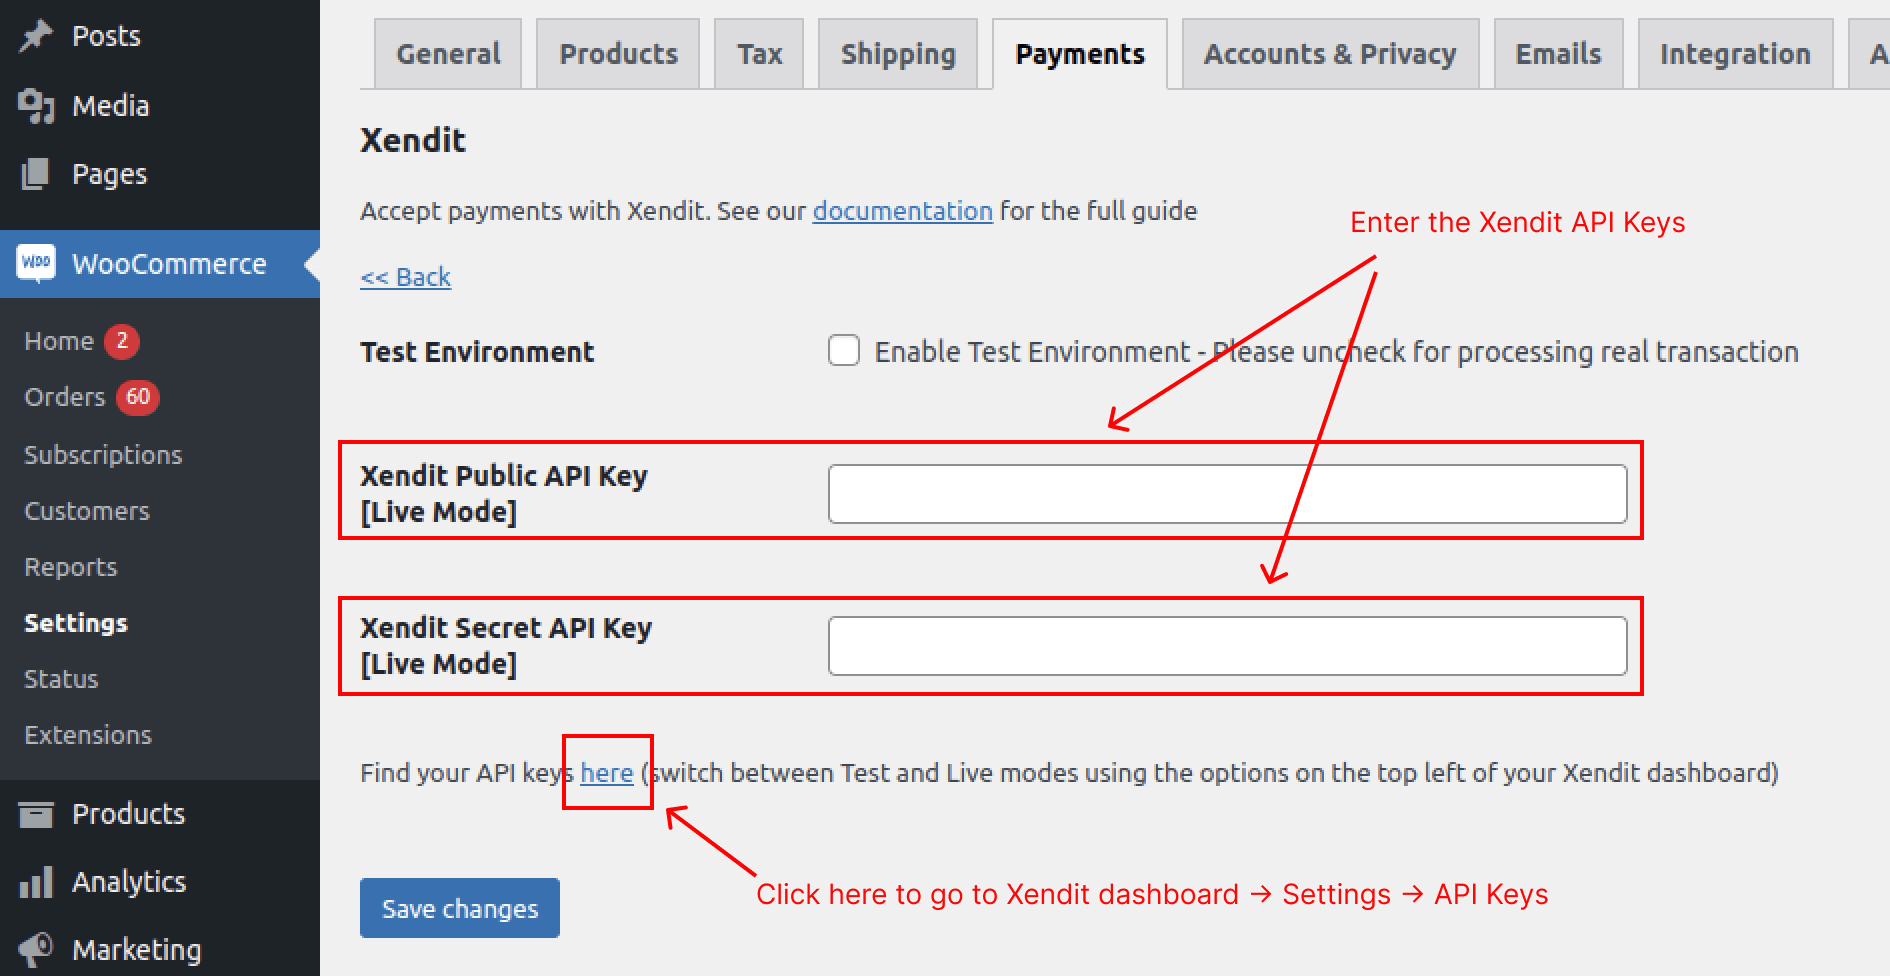
3. Copy the public API key & secret API key.
- Instructions on how to generate Secret API key can be found here
- Permission for Secret API key:
- Money In: Write
- Others: None
4. Paste it in your WooCommerce settings.
5. Click “Save Changes” on the bottom of the page
6. Done
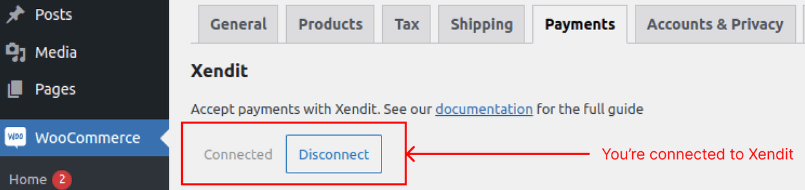
Here are some ways to check whether your installation is successful or not:
1. In the WooCommerce-Xendit settings page, you will see “Connected” button is grayed-out, and “Disconnect” button is available to be clicked
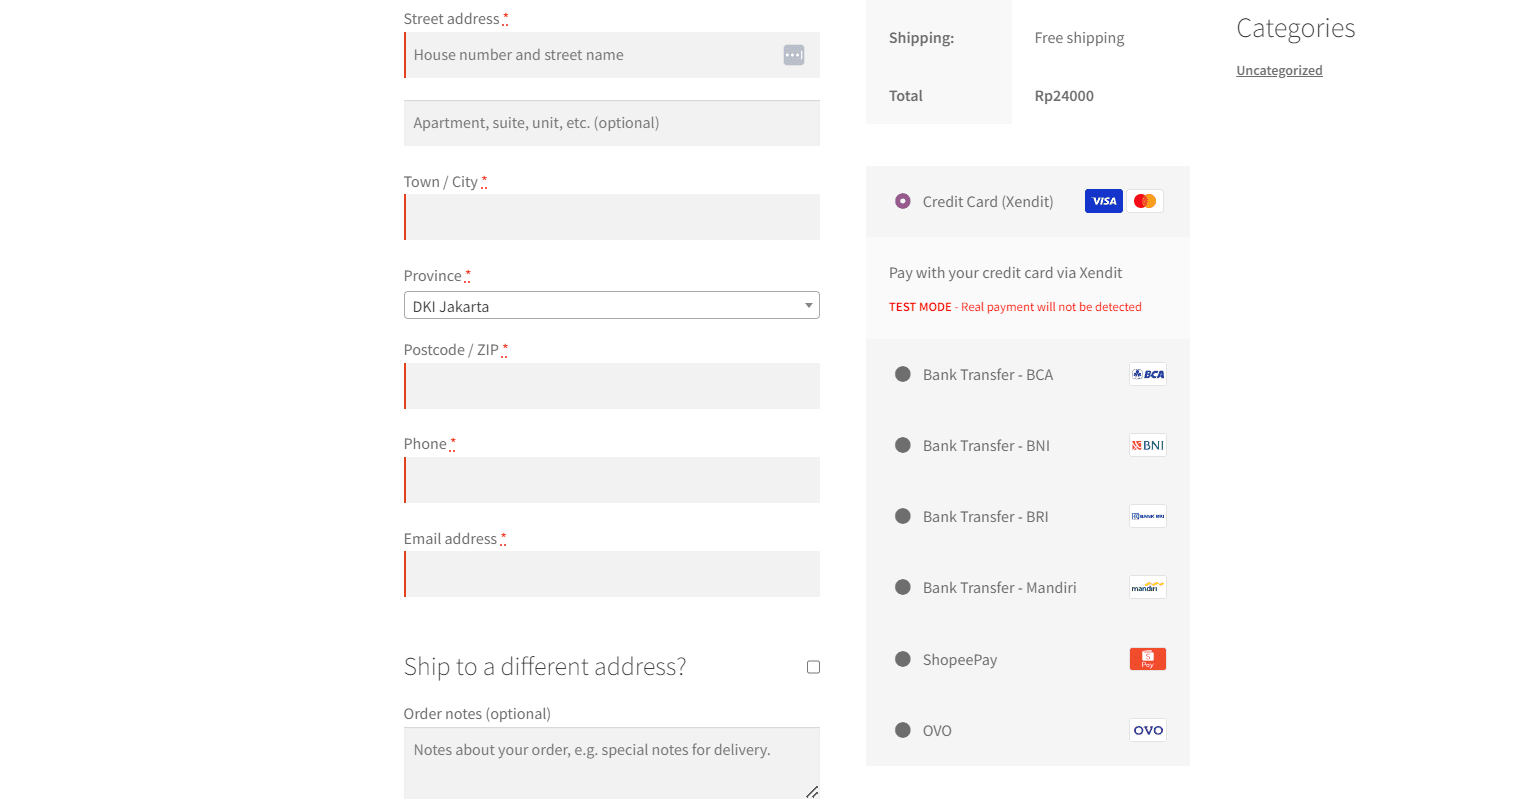
2. When you test checkout, you can already see Xendit payment methods on the checkout page
How to Disconnect
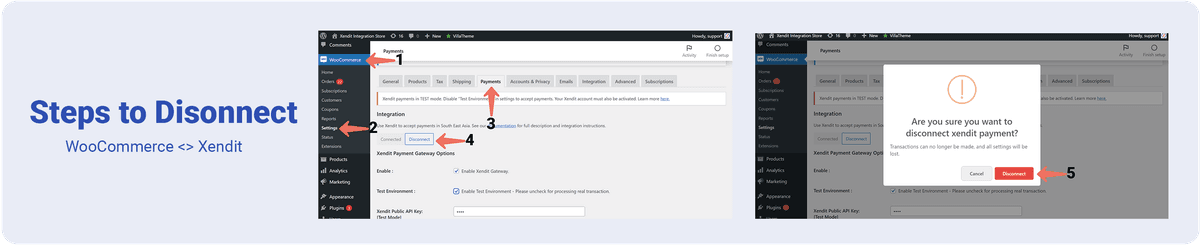
- Go to your WooCommerce dashboard and click on “WooCommerce”.
- Click on “Settings”.
- Click on “Payments”.
- Click the “Disconnect” button.
- Click on the “Disconnect” button if you wish to disconnect with Xendit.
Note:
- Disconnecting WooCommerce and Xendit can only be done by Administrator and Shop Manager.
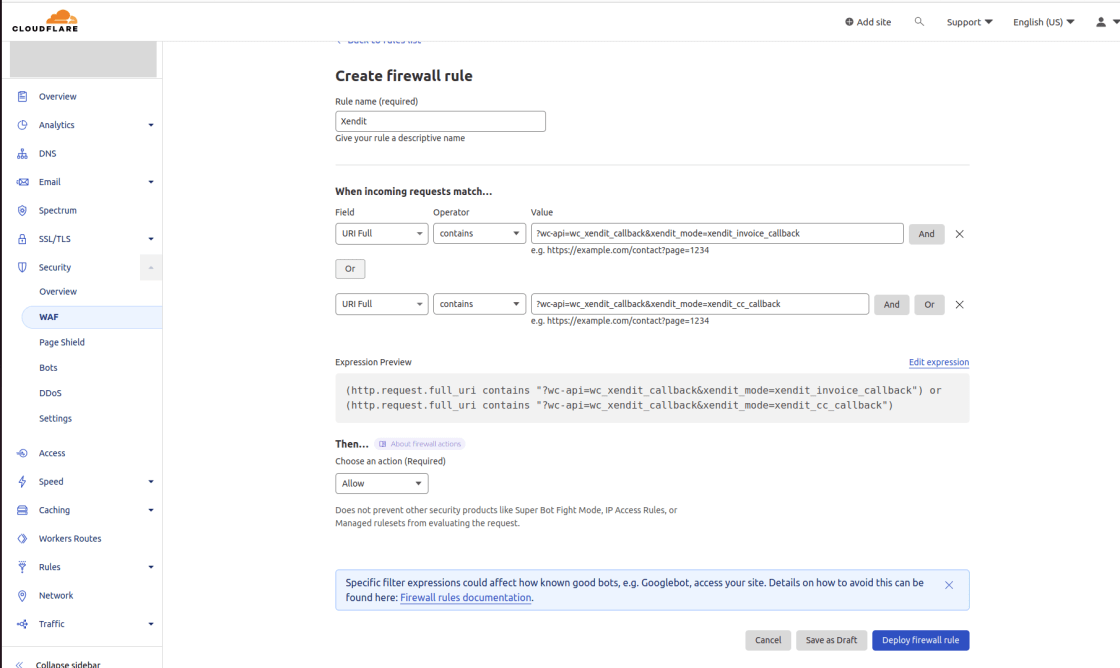
Optional: Firewall Whitelisting
If you happen to use firewall, there's an optional step, which is to whitelist Xendit Callback URLs in order to avoid unreceived callback:
- WooCommerce:
<merchant_site>/?wc-api=wc_xendit_callback&xendit_mode=xendit_invoice_callback - WooCommerce CC:
<merchant_site>/?wc-api=wc_xendit_callback&xendit_mode=xendit_cc_callback
You can input these URLs when creating firewall rules. Example below is the display if you're using Cloudflare:
Last Updated on 2023-11-29