Installation
Step 1:
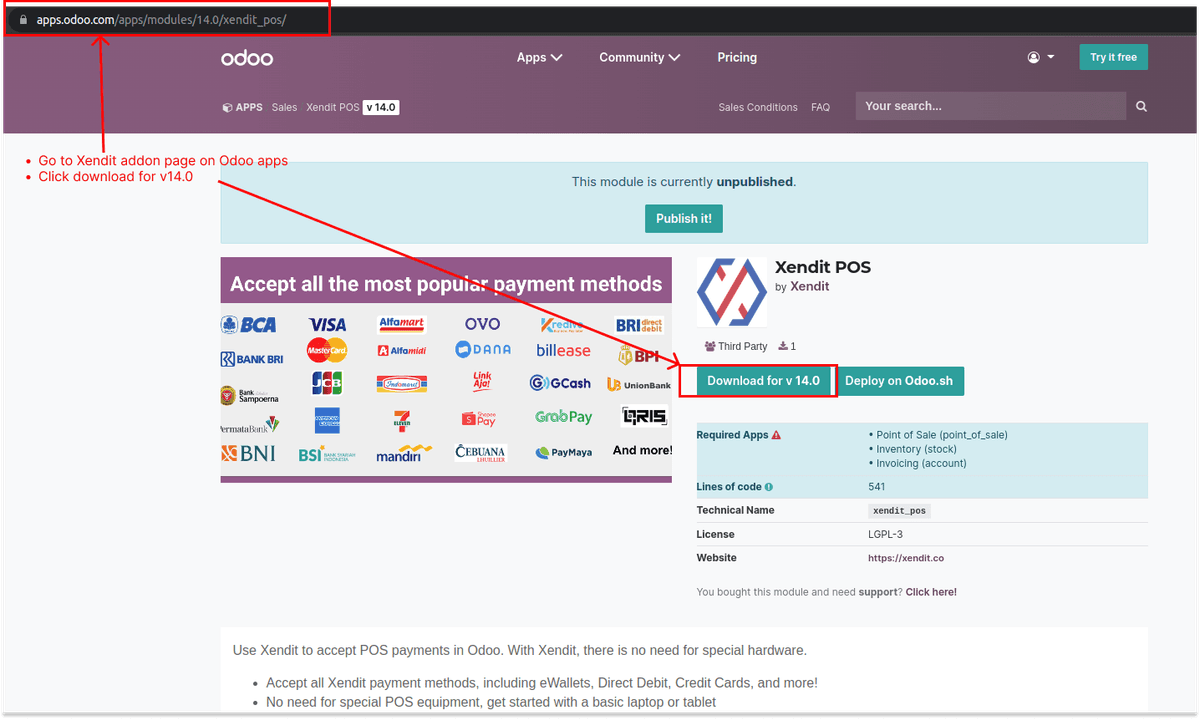
- Open the Xendit app and download for local or Odoo.sh
- Odoo v14: xendit_pos | Odoo Apps Store
- Odoo v15: xendit_pos | Odoo Apps Store
- Odoo v16: xendit_pos | Odoo Apps Store
Step 2:
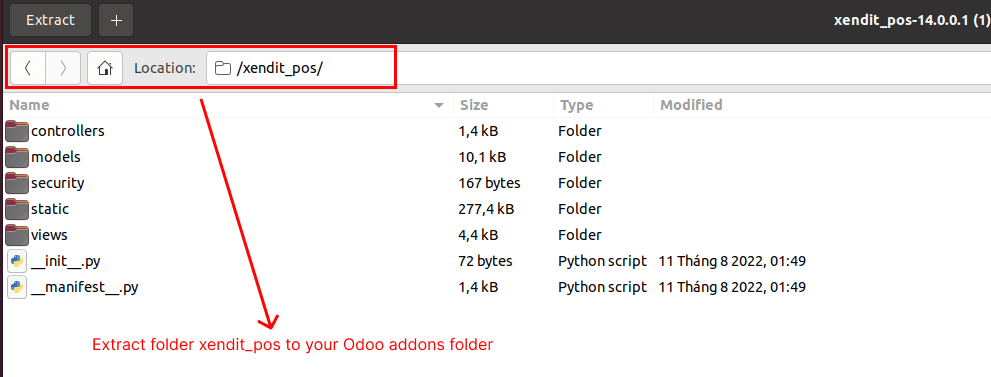
- Extract folder
xendit_posto your Odoo addons - You can check the Odoo addons path in the config file
/etc/odoo.conf - Then restart the odoo
- Via service, run this command:
systemctl restart odoo - Via odoo-bin, run this command:
cd /opt/odoo./odoo-bin -c /etc/odoo.conf
- Via service, run this command:
Step 3:
- Open the odoo on browser
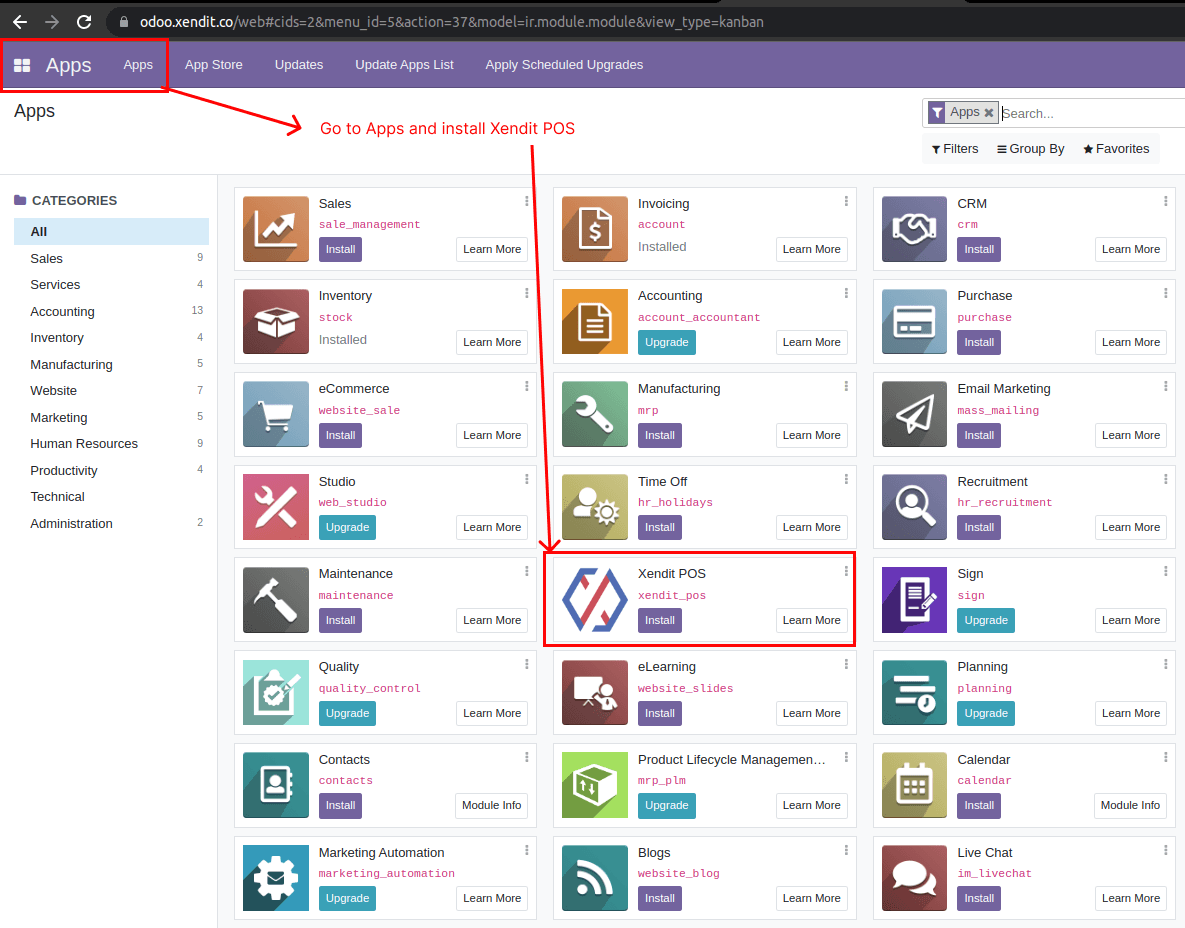
- On the left menu click on Apps
- Now you can see the Xendit POS addon showing here.
- Click on Install
- It will take few mins to finish the installation
Step 4:
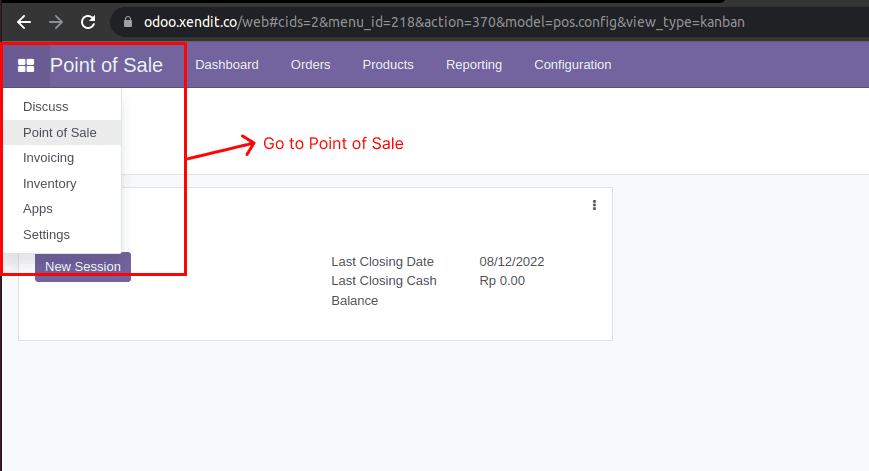
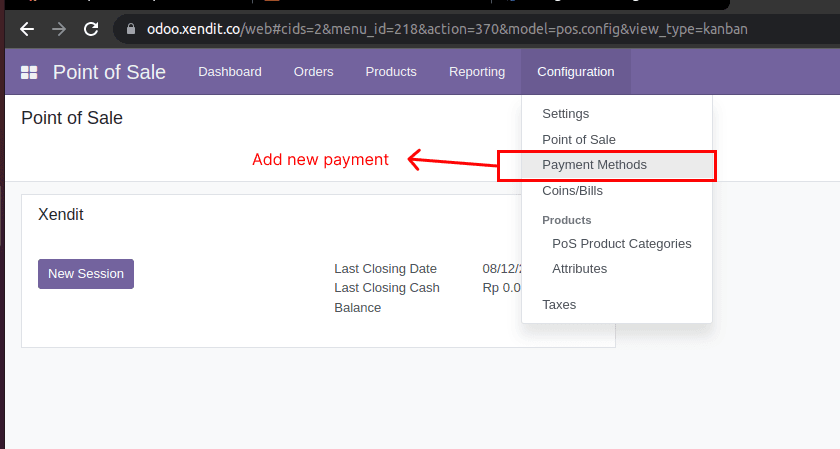
- Go to Point of Sale
Step 5:
- On the configuration, click Payment methods
Step 6:
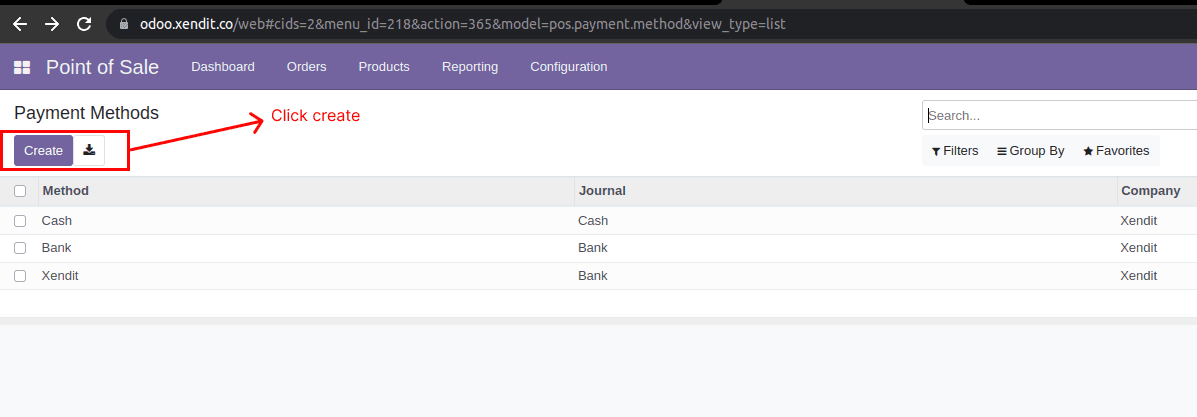
- Click on Create to add new payment method Xendit
Step 7:
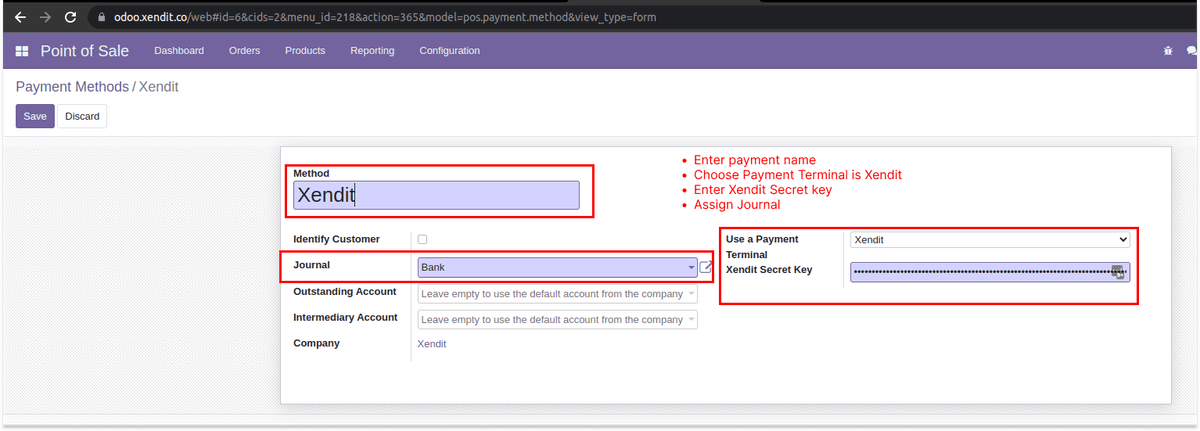
- Enter the Payment name, recommended “Xendit”. This name will show up during the POS checkout.
- For “Use a Payment Terminal”, choose: Xendit
- Enter the Xendit Secret key (You can get it from Xendit Dashboard → Settings → API Keys)
- Money in - Write
- Money out, XenPlatform, XenShield - None
- Note: Use test mode secret key to simulate test transaction in Odoo. Use Xendit live mode secret api key for real transactions.
- Assign to a Journal of your choice
- And click Save
Step 8:
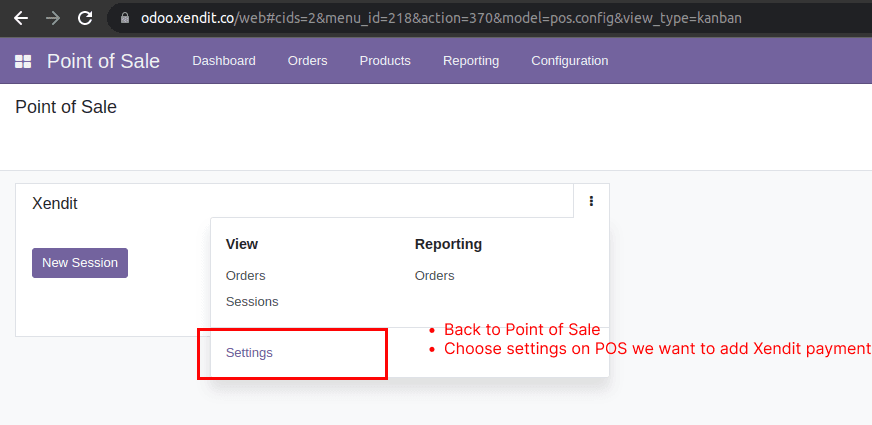
- To enable Xendit on POS sessions, go back to Point of Sale main home page
- Go to a specific POS, click the three dots, and click Settings.
- Note: the POS session must be closed before you can modify the settings
Step 9:
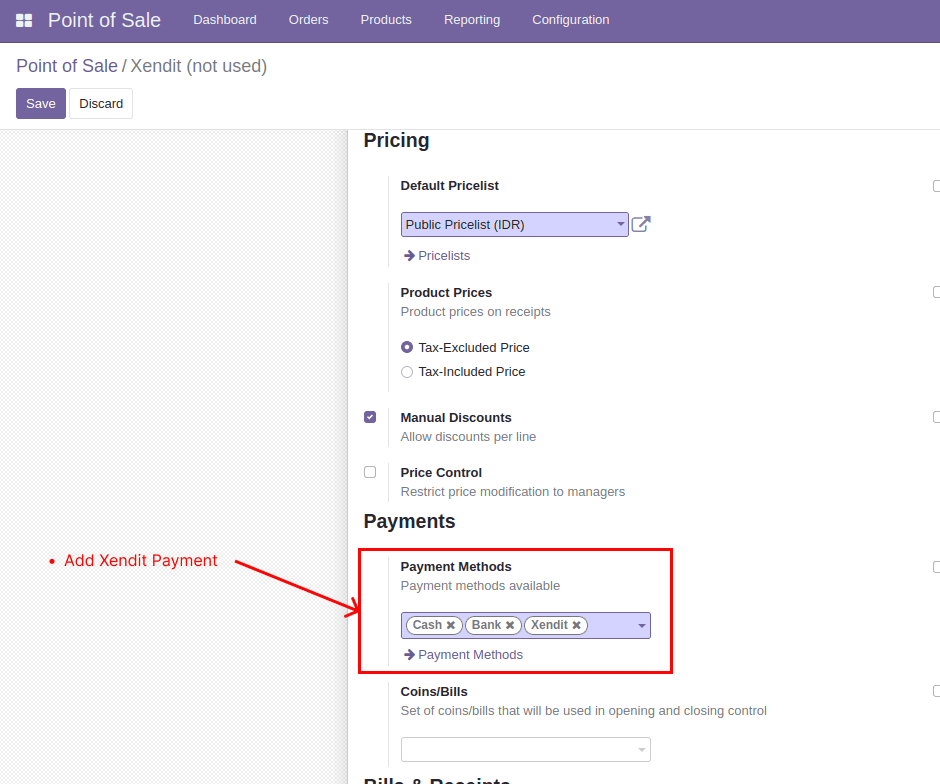
- On the Payments section, select Xendit (or the name you gave to Xendit POS in Step 7)
- Click Save
Step 10:
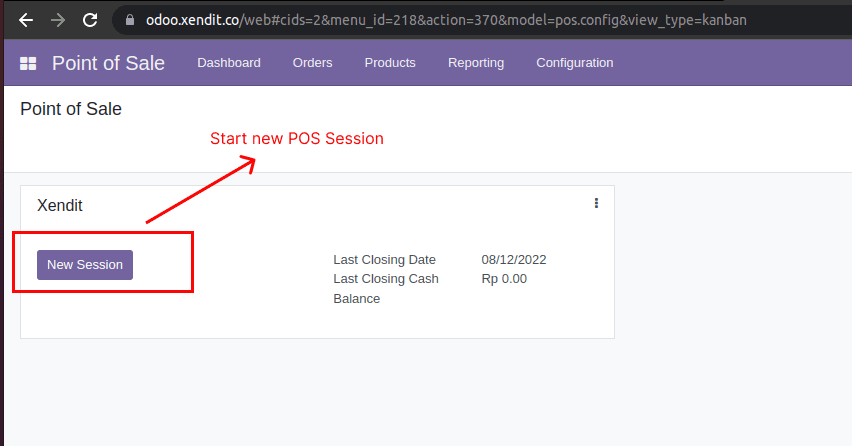
- To test if Xendit shows up, open a new session for your store.
Step 11:
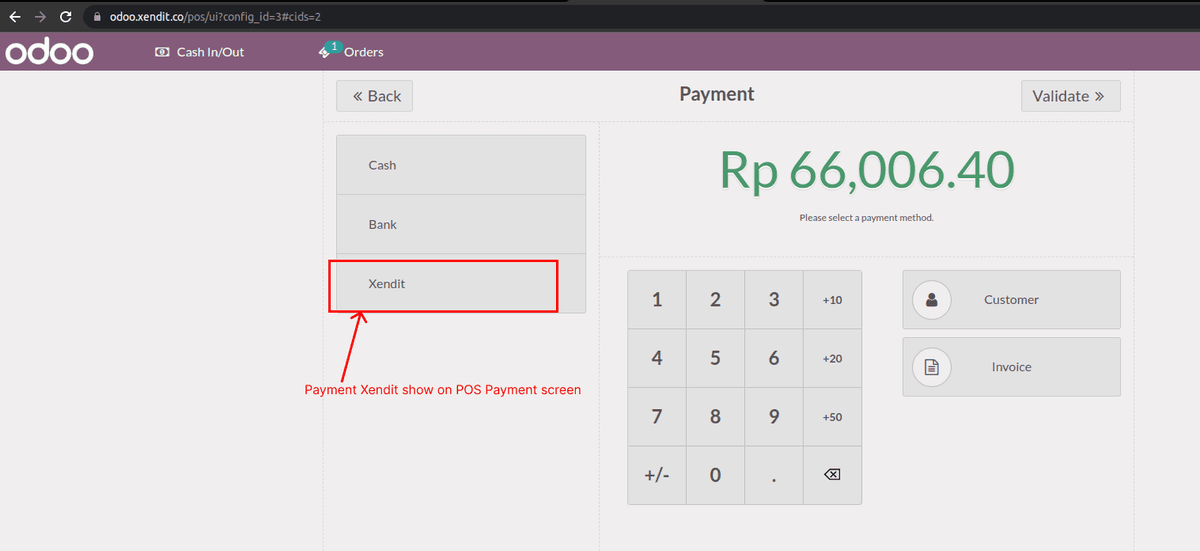
- Now when you create a new order and go to the Payment page, the Xendit payment will show there
Step 12:
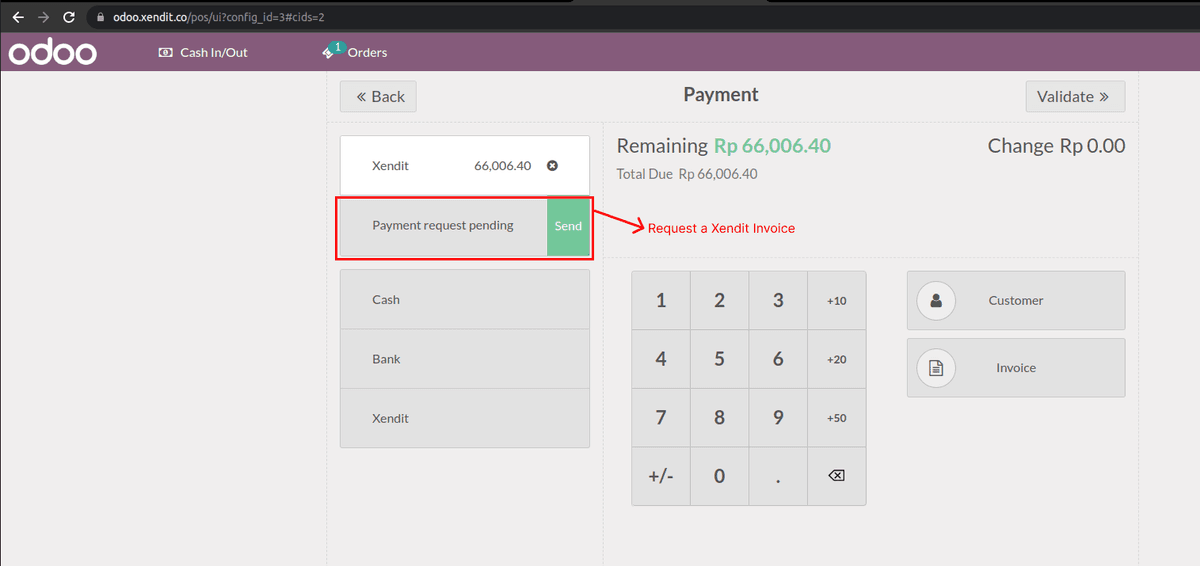
- On the Payments page, choose Xendit
- Click on Send to request a new Xendit invoice
Step 13:
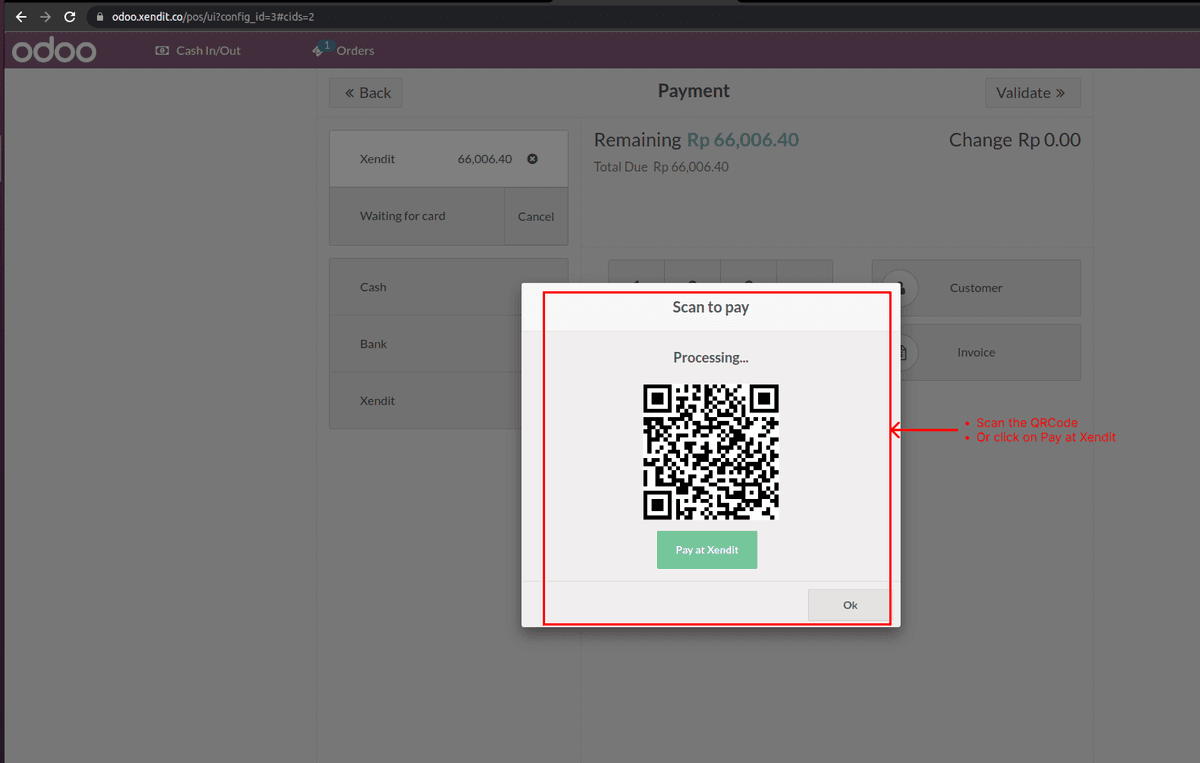
- The QR code will show on a popup. This QR code leads to the Xendit Payment Link.
- Have the customer scan the QR code with camera, not eWallet app.
- Have the employee click on the button “Pay at Xendit” to open the Xendit checkout on your own device.
- When you complete the payment on Xendit checkout, the Popup status will show PAID and you can complete the POS order
Last Updated on 2023-11-29